Account Transfer Guide
On this page

Requirements
- New instances must be created in your emulator Multi-Instance Manager
- Ensure both source and target instances exist.
Steps
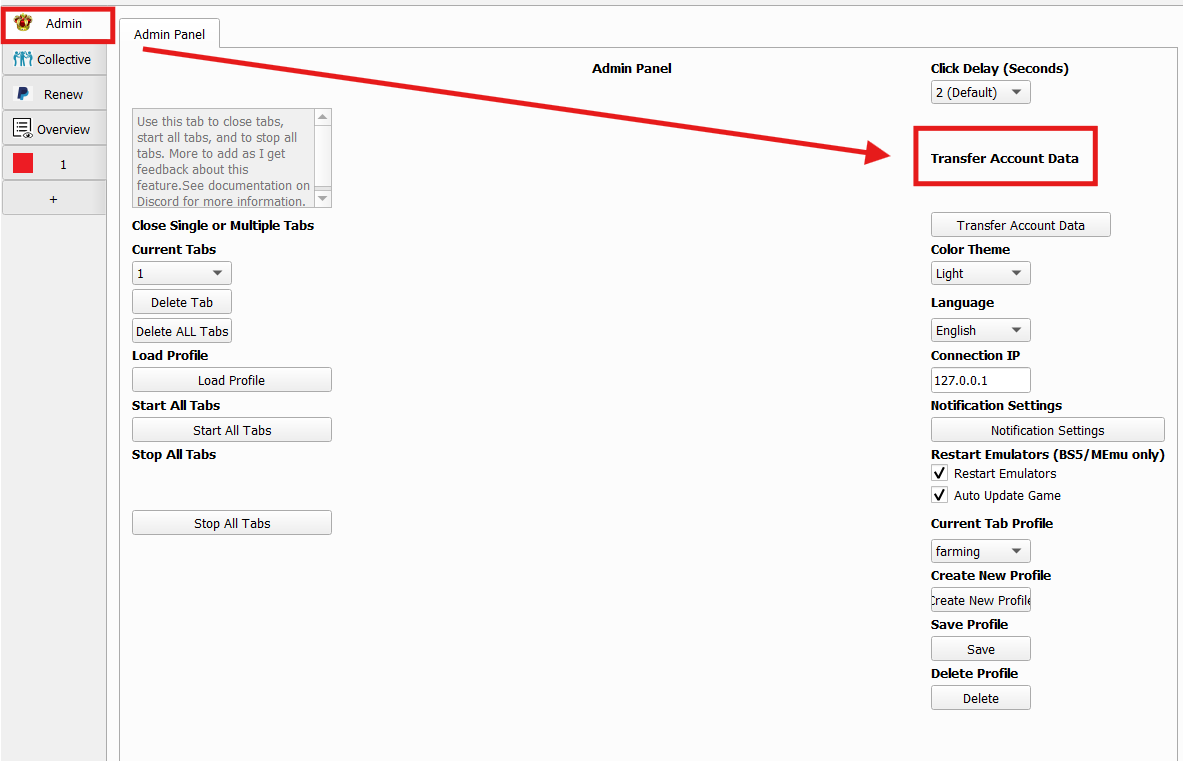
Click the Admin tab on the left, then select “Transfer Account Data.”
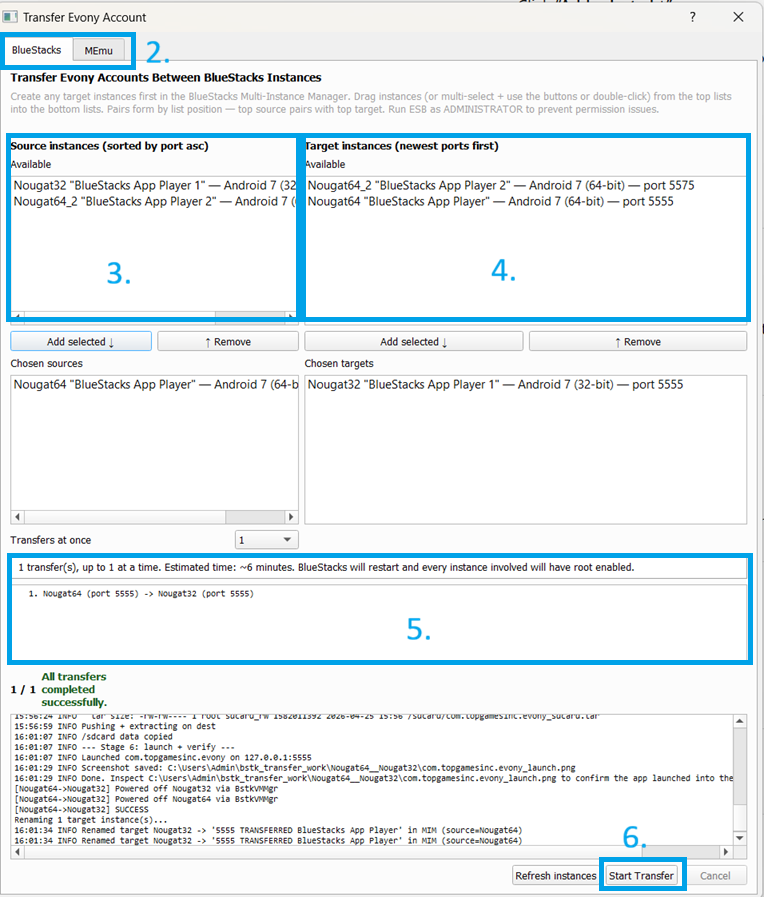
Select Emulator
- Choose BlueStacks or MEmu (top tabs).
Select Source Instance
- Choose the instance that currently has your account, then click “Add selected ↓”.
Select Target Instance
- Pick the instance you want to transfer to
- Click “Add selected ↓”
Pairing
- Make sure source → target pairing is correct
- You can also set how many transfers run at the same time, but we recommend using 1 for better stability.
Example:
- Nougat64 (port 5555) → Nougat32 (port 5555)
Click “Start Transfer” to begin.
- Takes around 5–10 minutes
- Wait until it shows completed successfully.
Note
- Instances may open/close during process (normal behavior)
- Run ESB as Administrator to avoid permission issues during transfer.
- BlueStacks must support root access for transfers to work, as it needs access to private instance data. Some newer BlueStacks versions no longer support root, which may cause issues.
- If your version doesn’t support root, you’ll need to manually create a new instance and reinstall the game.
- Tested working versions: BlueStacks 5.22.102 and below.