How to Use

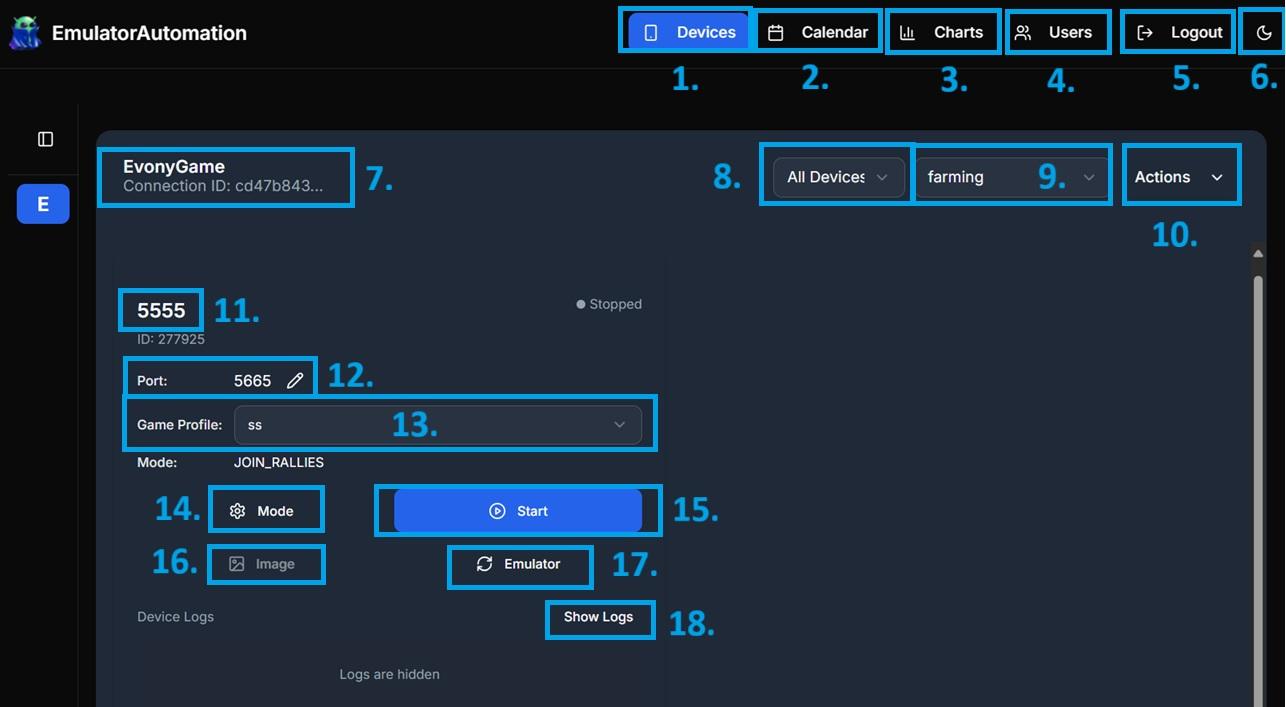
Devices
- This shows all instances you have opened in the bot.
Calendar
- Lets you schedule activities and modes in advance, so your bot automatically switches tasks at the right time.
Charts
- Here you can now view your Metrics directly on the dashboard, including resources gathered and bosses defeated for easier tracking.
Manage Sub-Users
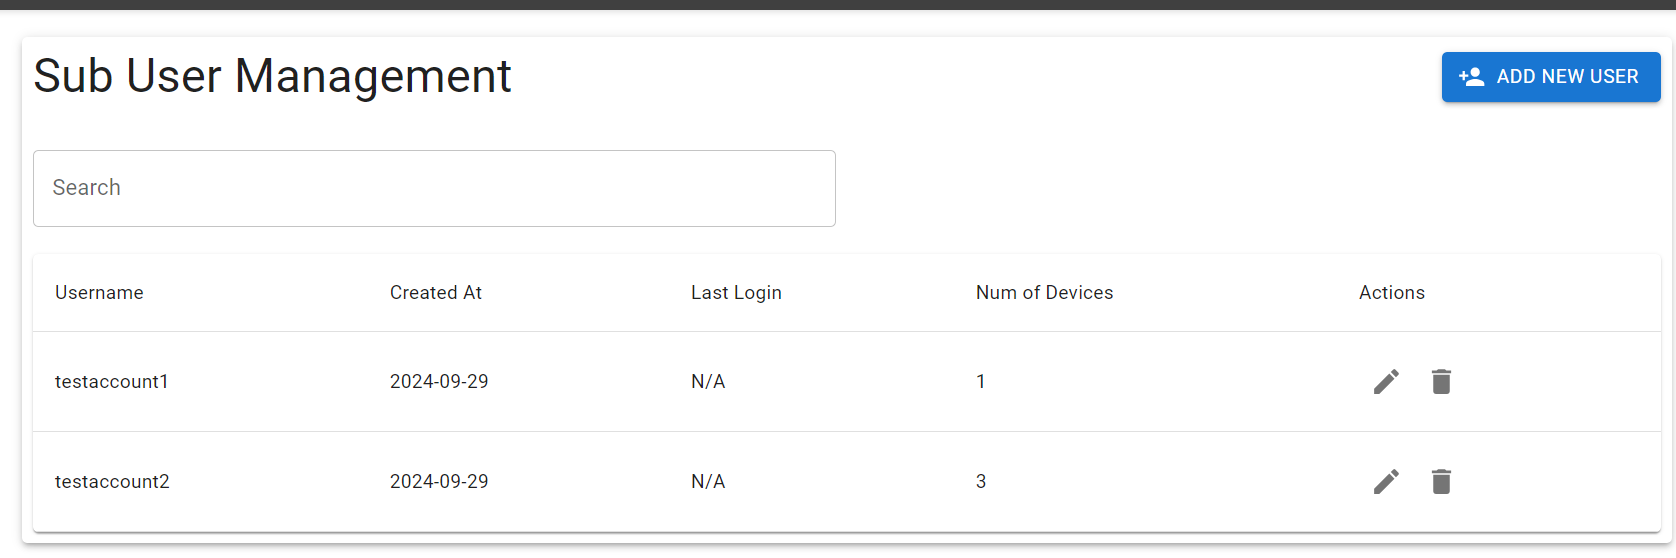
- You can now add sub-users to help manage clients or friends.
- This is beneficial if you want another person to monitor your instances; you can create a sub-account for them. Or a host may want to grant their customers access to allow them to change modes or profiles.
User Information
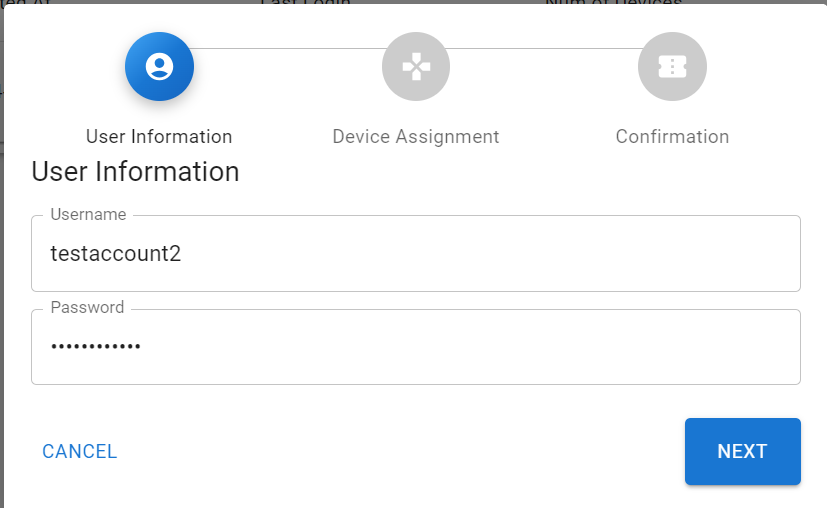
- Create a unique login that you can provide to your friends or clients to give them access to your dashboard.
Device Assignment
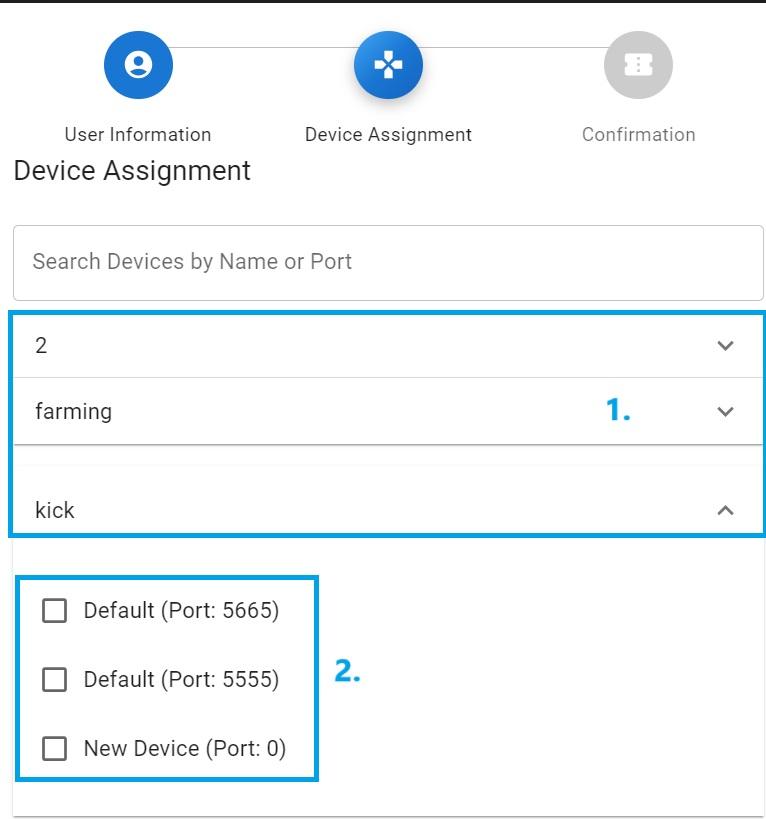
- Pick the admin profile in use.
- Select the device you want the user to have access to.
Confirmation
- Here, you can copy the login details you created, along with an overview of your selections.
- Now click 'Submit,' and the login information can be used by someone else to access your remote dashboard.
[!NOTE]
They will only see the profile and device that you assigned to the specific username you created for them.
Log Out:
- Click if you want to log out
Color Theme:
- You can change the theme to be the dark or light color scheme.
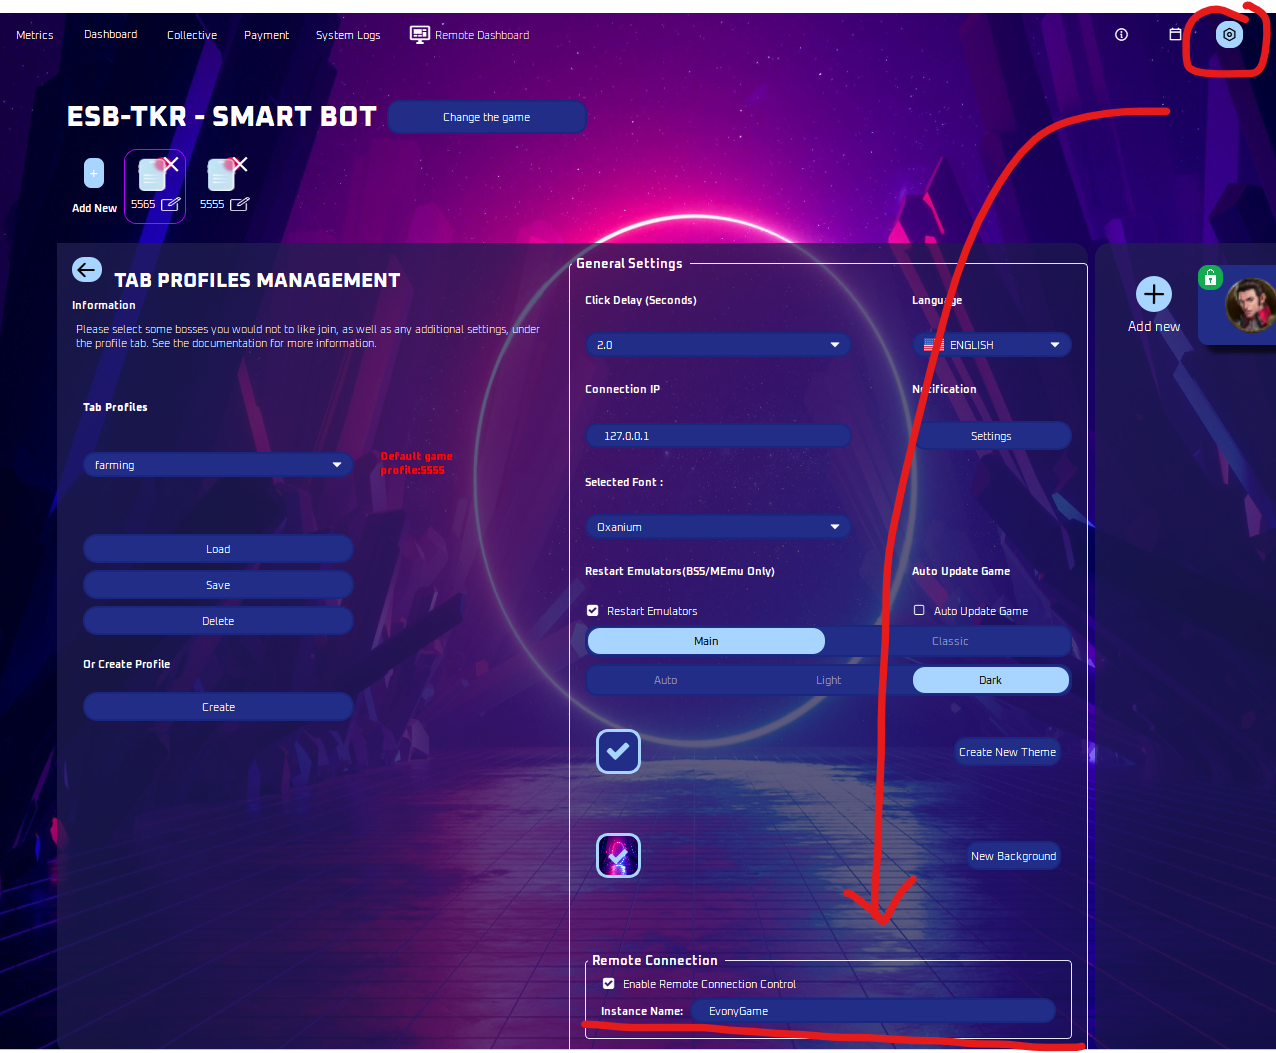
Connection Name:
- You can set the connection name per machine to identify which computer is being used.
- You can change the connection name on tag profile management in the bot.
Status:
- All: Displays all instances.
- Running: Displays only instances that are currently on.
- Stopped: Displays only instances that are currently off.
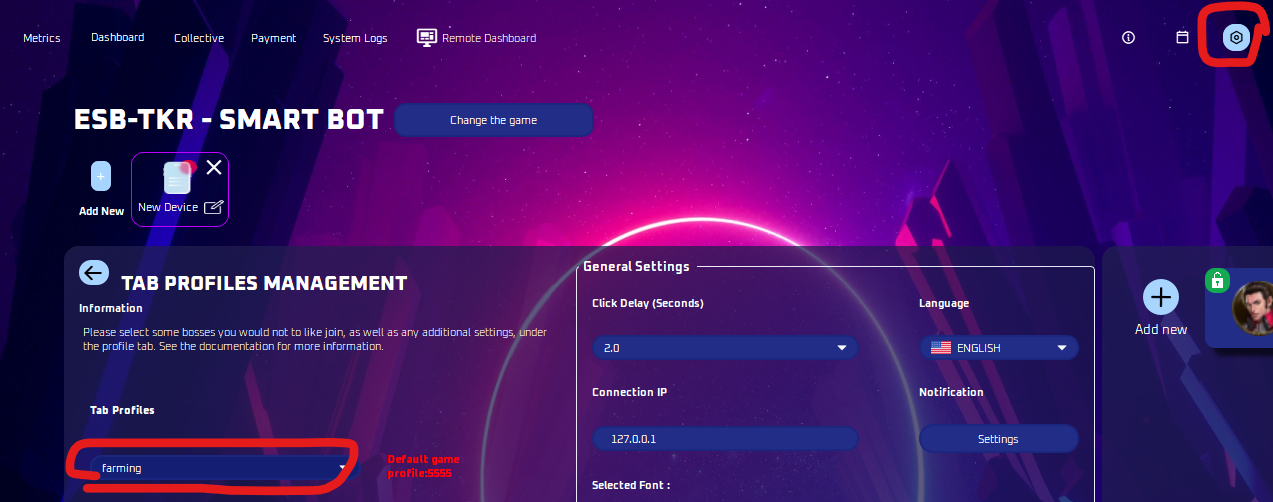
Admin Profile Name:
- Change the configuration by updating the admin profile settings in this section.
- Admin profile is the profile found here:
Actions
- Lets you quickly manage and monitor your devices.
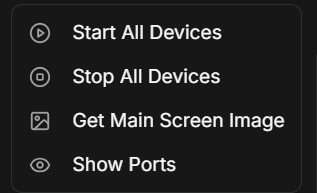
- Start All Devices
- This will start all your devices/ instances.
- Stop All Devices:
- This will stop all devices/ instances.
- Get Main Screen Image:
- This provides a screenshot of the main menu screen.
- Show Ports
- This will show all ports active.
Device Name
- Easily identify the instance by assigning a device name
- You can change the device name in the main menu of the bot, as shown below:
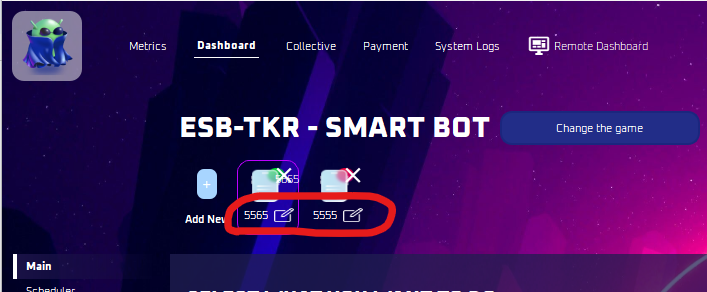
Edit Port:
- Modify the port number used per instance here
Game Profile:
- Change the configuration by updating the profile settings for instances here.
Change Mode
- You can now easily switch modes with one click, from joining rallies to auto-setting, farming, etc
Stop/ Start:
- This button will start or stop the instance in the bot.
Emulator Image:
- This action will show a screenshot of the emulator screen.
Restart Emulator:
- This will restart the entire instance and then relaunch the game.
- This is particularly useful if you suspect the game is frozen.
Logs:
- You can view the logs to monitor what the bot is doing or to check for any issues
Note
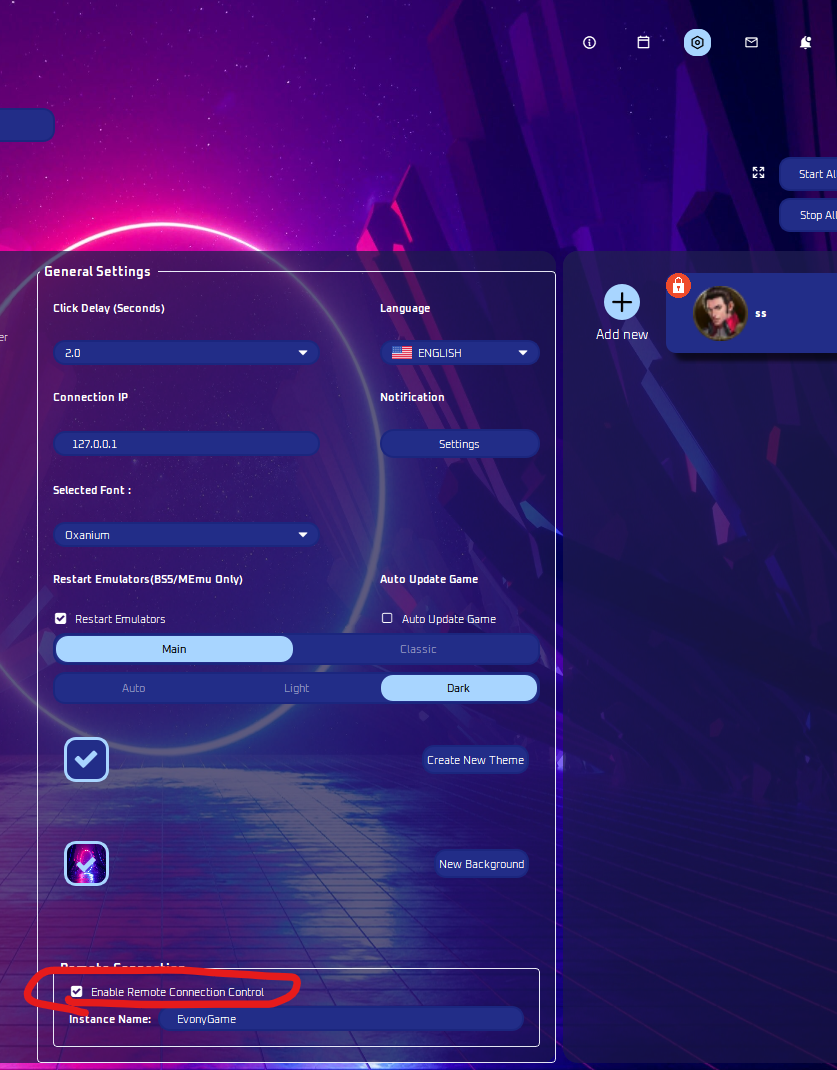
Make sure you have “enable remote connection control” turned on for this to work.