


Getting Started
Resource Transport Guide
Resource Transport Guide Send resources from one Cloud account to an alliance member. Choose who receives the resources, which resources to send, and how…
On this page
Resource Transport Guide
Send resources from one Cloud account to an alliance member. Choose who receives the resources, which resources to send, and how many trips to make each day.
Enable Resource Transport
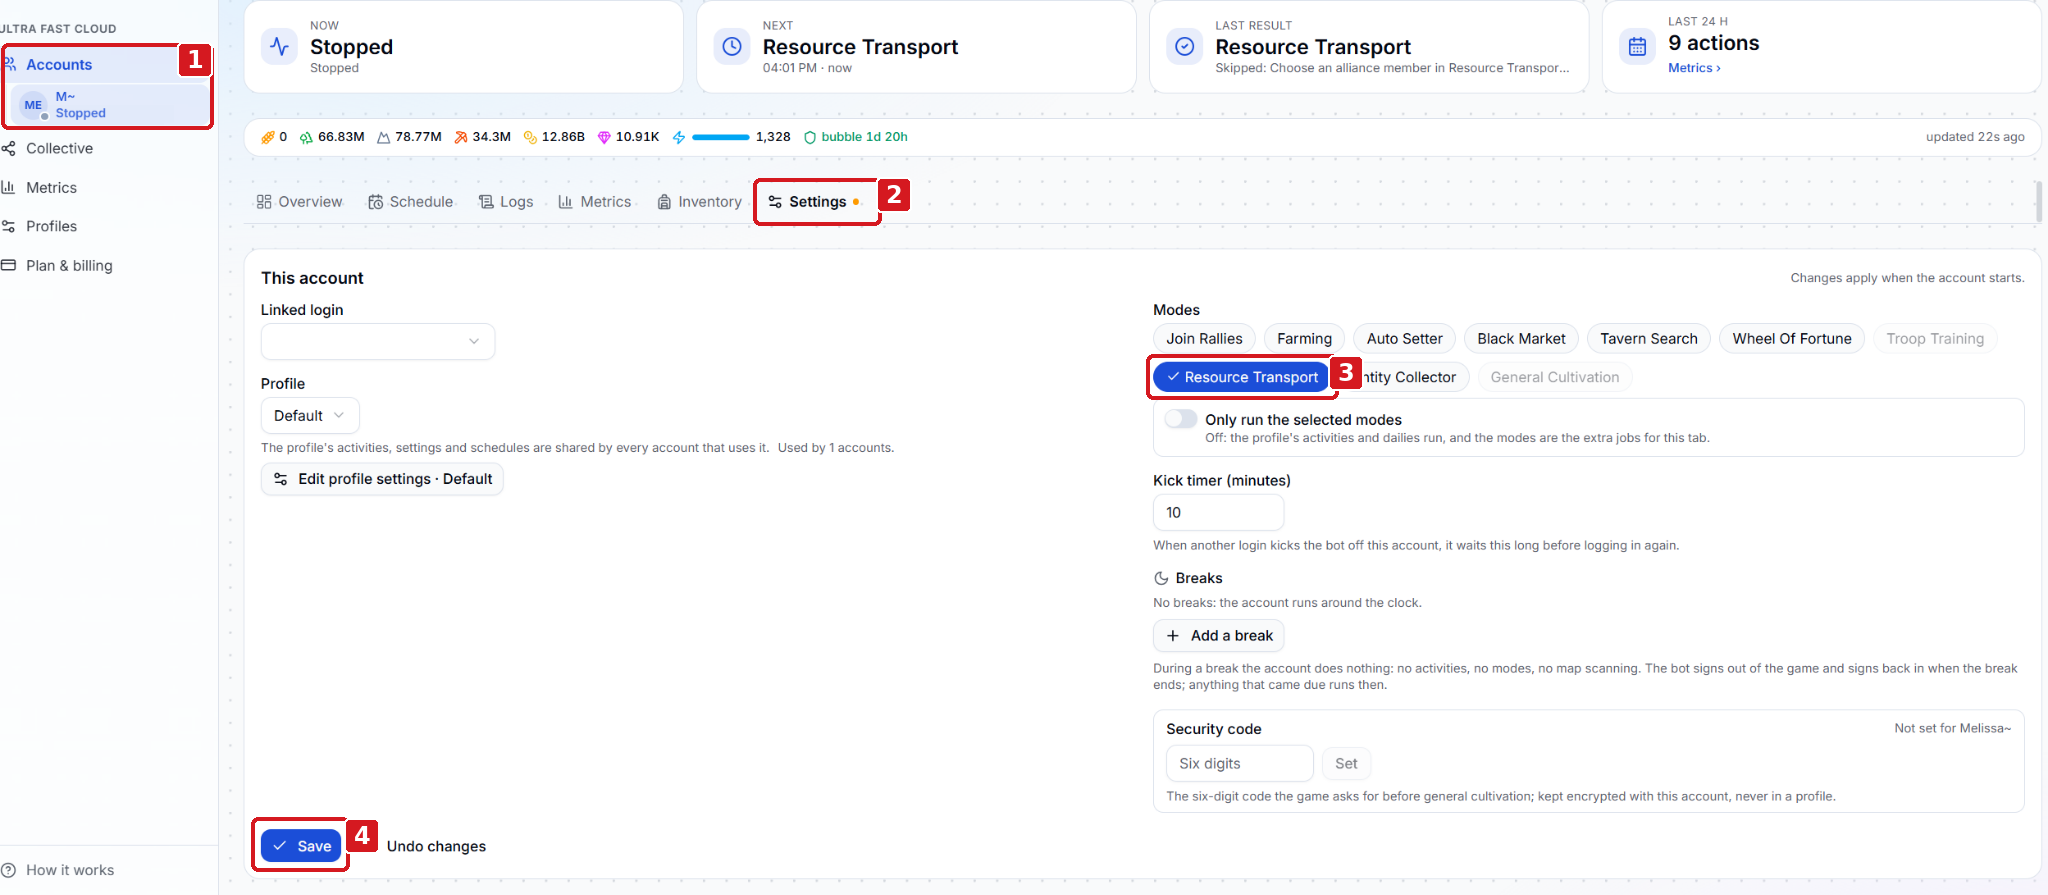
- Click Accounts and select the account that will send the resources.
- Open the account’s Settings tab.
- Under Modes, select Resource Transport.
- Click Save. Account settings take effect when the account starts. Scroll down on the same Settings page to reach the Resource Transport controls shown in the next screenshot.
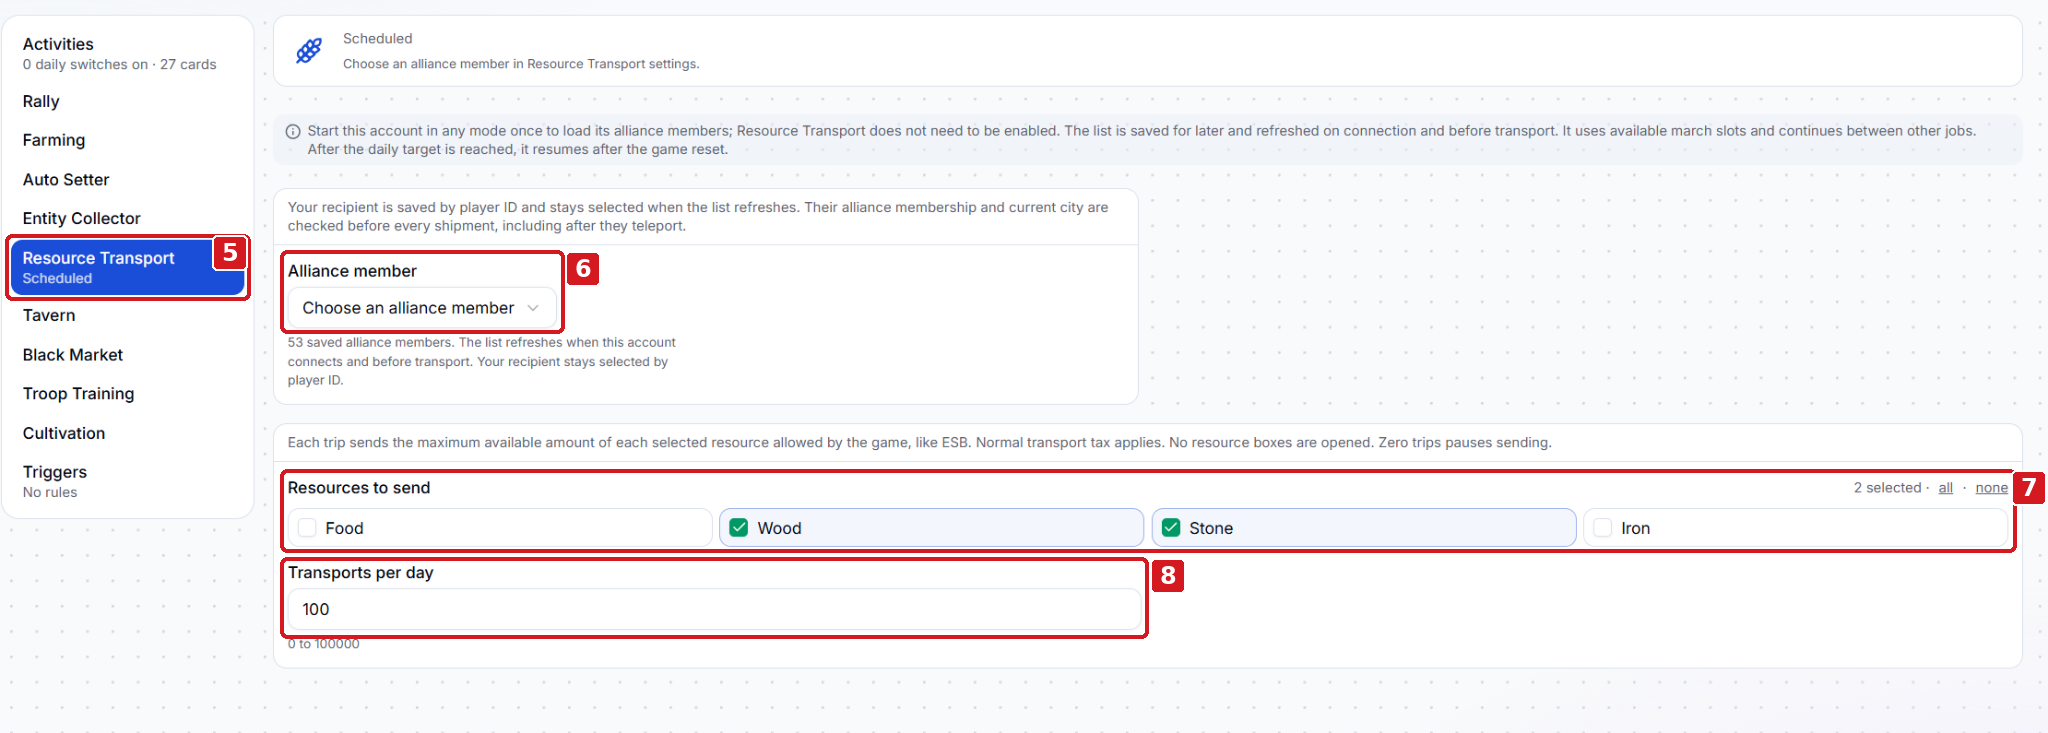
- Click Resource Transport in the settings menu.
- Under Alliance member, choose the recipient. If the list is empty, start the sending account once in resource transport mode to load its alliance members, then return to this dropdown. Cloud saves the recipient by player ID and checks their alliance membership and current city before each shipment, including after a teleport.
- Under Resources to send, select Food, Wood, Stone, or Iron. You can select more than one. Each trip sends as much of each selected resource as the game allows from the account’s available balance. Normal transport tax applies, and resource boxes stay unopened.
- Set Transports per day to the number of trips you want the account to make each day. Enter 0 to pause sending. After reaching the daily target, the account resumes after the game reset.
Start the sending account once setup is complete. Resource Transport uses available march slots and runs between other jobs.