

Getting Started
Plan & Billing Guide
Cloud Payment Guide Use Plan & billing in the Cloud dashboard to check your slot usage, buy more Cloud slots, or purchase new Evony alt accounts. Each…
이 가이드는 아직 한국어로 번역되지 않아 영어로 표시돼요.
이 페이지에서
Cloud Payment Guide
Use Plan & billing in the Cloud dashboard to check your slot usage, buy more Cloud slots, or purchase new Evony alt accounts. Each Evony account you want to run on Cloud needs one slot. Linking an existing account is free.
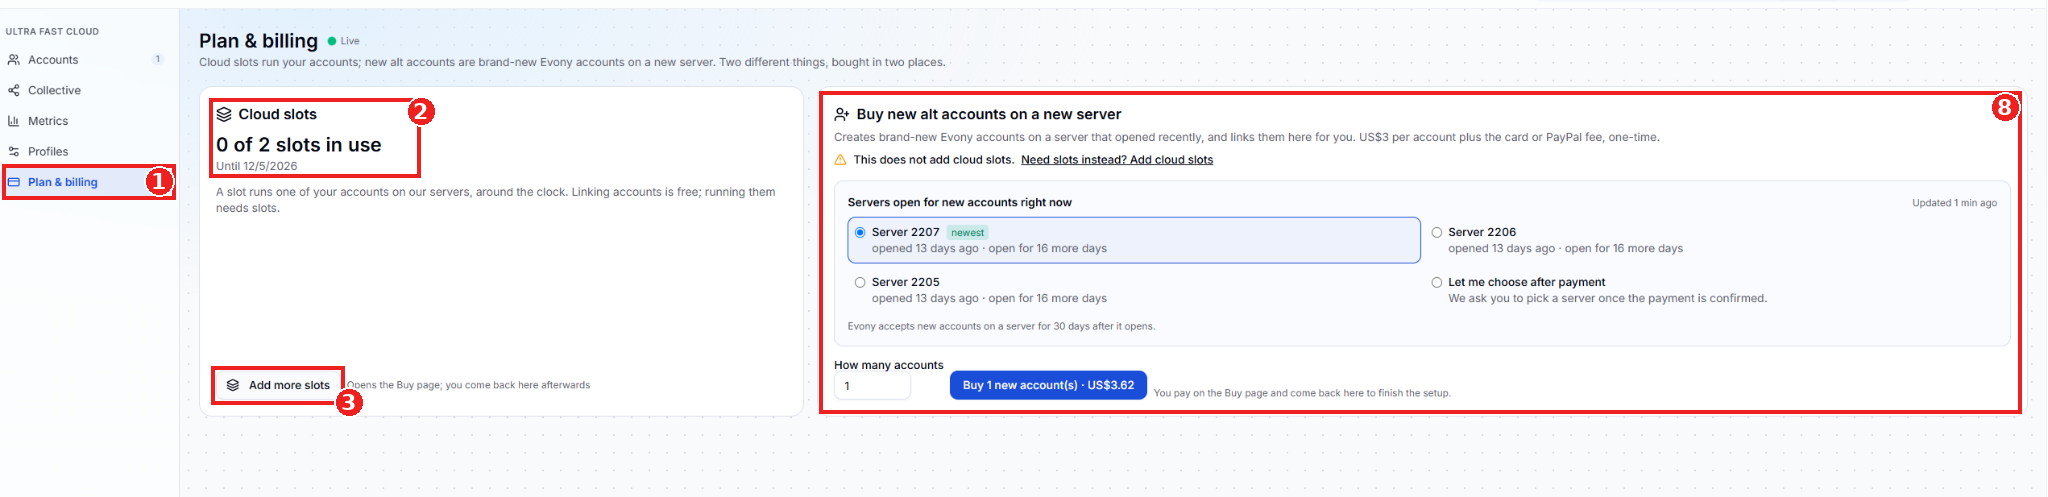
- Plan & billing - Open Cloud in the EAT Dashboard and select Plan & billing from the sidebar.
- Cloud slots - Check how many slots are in use, how many your plan includes, and when your current slot access ends.
- Add more slots - Click this button to open the EAT website’s Buy page, shown in the next screenshot.
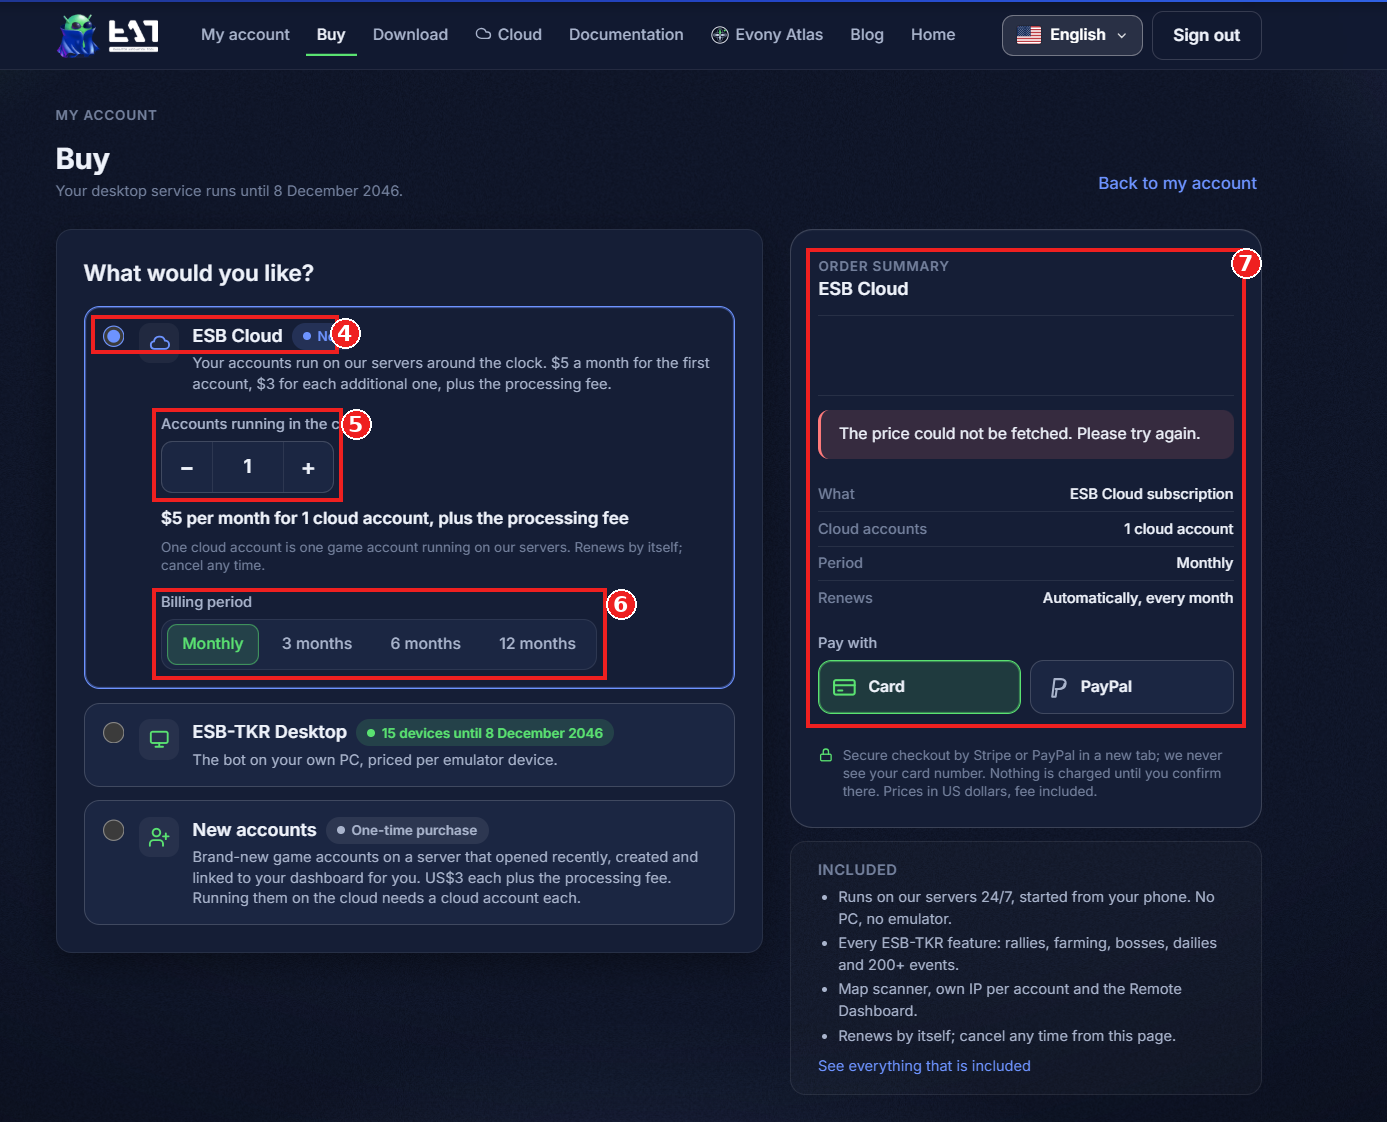
- ESB Cloud - Make sure ESB Cloud is selected on the Buy page.
- Accounts running in the cloud - Use + or − to set how many accounts you want to run on Cloud.
- Billing period - Choose Monthly, 3 months, 6 months, or 12 months.
- Order summary and payment - Review the account count, billing period, renewal terms, and total in USD, including the processing fee. Choose Card or PayPal, then confirm the payment in the secure checkout tab. Return to Plan & billing to check your slot count.
If the order summary says The price could not be fetched, try again and check that a total appears before continuing to checkout.
Buy new alt accounts
8. Buy new alt accounts on a new server - Choose one of the available servers, or select Let me choose after payment. Enter how many new accounts you want, then click the blue Buy button. Complete payment on the website and return to Plan & billing to finish setup. New alt accounts are a one-time purchase and are linked to your dashboard. To run them on Cloud, make sure you have one Cloud slot available for each account you want to start.